mNo edit summary Tag: Source edit |
No edit summary Tag: Visual edit |
||
| Line 5: | Line 5: | ||
|rarity = Limited Time Mode |
|rarity = Limited Time Mode |
||
|release_date = 6/13/2019 |
|release_date = 6/13/2019 |
||
| + | }}{{Quotation|Squad up and prepare to defend against the horde of Fiends invading the island.}}'''Horde Rush''' is a [[Limited Time Modes|Limited Time Mode]] in [[Fortnite: Battle Royale]] that released in [[Season 9]]. The mode was brought back in [[Chapter 2: Season 8]] with alterations. |
||
| − | }} |
||
| − | {{Quotation|Squad up and prepare to defend against the horde of Fiends invading the island.}} |
||
| − | '''Horde Rush''' is a [[Limited Time Modes|Limited Time Mode]] in ''[[Fortnite: Battle Royale]]'' that released on June 13th, 2019. |
||
== LTM Rules and Gameplay == |
== LTM Rules and Gameplay == |
||
| + | Horde Rush is a Cooperative gamemode, similar to modes present in [[Fortnite: Save the World]]. Players must work together to eliminate [[Cube Monsters]], and complete three Encounters. Players win the mode by eliminating the Boss, [[Caretaker|The Caretaker]]. |
||
| − | To get the victory, you must survive 3 Rounds. |
||
| − | ===First Round=== |
||
| − | The first round is divided into two parts. |
||
| + | Players fight in three encounters: |
||
| − | At the start, you have 2.5 minutes to gear up before waves of [[Cube Monsters|Sideways Monsters]] start spawning from Obelisks. You have to push them back for several minutes in order to get to the next part. The next part takes place in a much smaller Storm circle. |
||
| + | * Players have 150 seconds to loot the area, and prepare for an attack. Monsters will spawn from Obelisks, and players complete the round by surviving. |
||
| − | The Sideways Monsters that spawn in this round are Fiends, Ranged Fiends, Poison Fiends, Elite Fiends and Brutes. |
||
| + | * Players must then follow [[The Storm|the storm]] to a new location, fighting monsters all the way. |
||
| + | * Players then have another 60 seconds to loot the area. Monsters again spawn from Obelisks, and players must eliminate a [[Cube Assassin]]. Players complete the round by surviving. |
||
| + | * Players must then follow the storm again to a new location, fighting monsters all the way. |
||
| + | * Players then have another 60 seconds to loot the area. Monsters again spawn from Obelisks, and players must eliminate a Caretaker. Players complete the round by eliminating the Boss, and winning the game. |
||
| + | As rounds increase, more enemies spawn, and different varieties too. The storm circle continuously shrinks as players stay alive. |
||
| − | ===Second Round=== |
||
| − | The second round is divided into two parts. |
||
| + | == Enemies == |
||
| − | During the first part, [[Cube Assassin]] spawns as the {{AICharacterBoss}}. This round features stronger Sideways Monsters, i.e. Elite Brutes, Ranged Ice Fiends and Exploding Brutes. |
||
| + | Enemies that spawn in round 2 will also spawn as the storm begins to move after the end of the first round. All of the enemies, bar the Cube Assassin and Caretaker will drop Cube Monster parts. All enemies bar the Caretaker will drop various loot on elimination. |
||
| − | |||
| + | {| class="fandom-table" |
||
| − | The second part takes place in a smaller moving Storm circle. |
||
| + | !'''Enemy Name''' |
||
| + | !'''Icon''' |
||
| + | !'''Round Spawns''' |
||
| + | |- |
||
| + | |Fiend |
||
| + | |[[File:Apparition Grunt - Creatures - Fortnite.png|center|100px|link=https://fortnite.fandom.com/wiki/File:Apparition_Grunt_-_Creatures_-_Fortnite.png]] |
||
| + | |All |
||
| + | |- |
||
| + | |Elite Fiend |
||
| + | |[[File:Elite Fiend - Creatures - Fortnite.png|center|100px|link=https://fortnite.fandom.com/wiki/File:Elite_Fiend_-_Creatures_-_Fortnite.png]] |
||
| + | |All |
||
| + | |- |
||
| + | |Ranged Fiend |
||
| + | |[[File:Ranged Fiend (C2S8) - Creatures - Fortnite.png|center|100px|link=https://fortnite.fandom.com/wiki/File:Ranged_Fiend_(C2S8)_-_Creatures_-_Fortnite.png]] |
||
| + | |All |
||
| + | |- |
||
| + | |Poison Fiend |
||
| + | |[[File:Poison Fiend (C2S8) - Creatures - Fortnite.png|center|100px|link=https://fortnite.fandom.com/wiki/File:Poison_Fiend_(C2S8)_-_Creatures_-_Fortnite.png]] |
||
| + | |All |
||
| + | |- |
||
| + | |Ice Fiend |
||
| + | |[[File:Ice Fiend (C2S8) - Creatures - Fortnite.png|center|100px|link=https://fortnite.fandom.com/wiki/File:Ice_Fiend_(C2S8)_-_Creatures_-_Fortnite.png]] |
||
| + | |2 and 3 |
||
| + | |- |
||
| + | |Brute |
||
| + | |[[File:Apparition Heavy - Creatures - Fortnite.png|center|100px|link=https://fortnite.fandom.com/wiki/File:Apparition_Heavy_-_Creatures_-_Fortnite.png]] |
||
| + | |All |
||
| + | |- |
||
| + | |Elite Brute |
||
| + | |[[File:Elite Brute (C2S8) - Creatures - Fortnite.png|center|100px|link=https://fortnite.fandom.com/wiki/File:Elite_Brute_(C2S8)_-_Creatures_-_Fortnite.png]] |
||
| + | |All |
||
| + | |- |
||
| + | |Exploding Brute |
||
| + | |[[File:Exploding Brute (C2S8) - Creatures - Fortnite.png|center|100px|link=https://fortnite.fandom.com/wiki/File:Exploding_Brute_(C2S8)_-_Creatures_-_Fortnite.png]] |
||
| + | |2 and 3 |
||
| + | |- |
||
| + | |Mega Brute |
||
| + | |[[File:Apparition Heavy Gold - Icon - Fortnite.png|center|100px|link=https://fortnite.fandom.com/wiki/File:Apparition_Heavy_Gold_-_Icon_-_Fortnite.png]] |
||
| + | |2 and 3 |
||
| + | |- |
||
| + | |[[Caretaker]] |
||
| + | |[[File:Caretaker - Creatures - Fortnite.png|center|100px|link=https://fortnite.fandom.com/wiki/File:Caretaker_-_Creatures_-_Fortnite.png]] |
||
| + | |3 only |
||
| + | |- |
||
| + | |[[Cube Assassin]] |
||
| + | |[[File:Cube Assassin - NPC - Fortnite.png|link=https://fortnite.fandom.com/wiki/File:Cube%20Assassin%20-%20NPC%20-%20Fortnite.png|alt=|center|100x100px]] |
||
| + | |2 only |
||
| + | |} |
||
| − | == |
+ | == Loot == |
| + | Loot tables are different in this mode, and the items available are, but not limited to: |
||
| − | During the last round, players will have to defeat the [[Caretaker]] in order to achieve Victory Royale. His health bar will be shown on top of the screen. |
||
| − | |||
| − | The third round features all kinds of Sideways Monsters. |
||
| − | |||
| − | === Storm === |
||
| − | The Storm spawns at one set location. After one round, you must follow it until it stops at another location. |
||
| − | === Looting === |
||
| − | In the first storm phase, there is only a few chests to loot. Destroy Obelisks and collect Score Multipliers to gather better loot. |
||
| − | |||
| − | ==Exclusive Weaponry== |
||
| − | The following weapons are exclusive to this LTM: |
||
{| class="fandom-table" |
{| class="fandom-table" |
||
| − | !Name |
+ | !'''Name''' |
| + | !'''Icon''' |
||
| − | !Image |
||
| + | !'''Category''' |
||
| − | !Rarity |
||
| + | !'''Description''' |
||
| − | !Category |
||
|- |
|- |
||
| − | |[[ |
+ | |[[Wood]] |
| + | |[[File: Icon logs.png|center|100px|link=https://fortnite.fandom.com/wiki/File:Icon_logs.png]] |
||
| − | |[[File:Sideways Rifle - Weapon - Fortnite.png|100px|center]] |
||
| + | |[[Materials|Material]] |
||
| − | |{{Common}} |
||
| + | |Basic Material obtained from wooden structures, such as trees. |
||
| + | |- |
||
| + | |[[Stone]] |
||
| + | |[[File: Icon Stone.png|center|100px|link=https://fortnite.fandom.com/wiki/File:Icon_Stone.png]] |
||
| + | |[[Materials|Material]] |
||
| + | |Basic Material obtained from stone structures, such as rocks. |
||
| + | |- |
||
| + | |[[Metal]] |
||
| + | |[[File:Icon IBeam.png|alt=|center|100px|link=https://fortnite.fandom.com/wiki/File:Icon_IBeam.png]] |
||
| + | |[[Materials|Material]] |
||
| + | |Basic Material obtained from metal structures, such as vehicles. |
||
| + | |- |
||
| + | |[[Bars]] |
||
| + | |[[File:Bars (Small) - Currency - Fortnite.png|alt=|center|100px|link=https://fortnite.fandom.com/wiki/File:Bars_(Small)_-_Currency_-_Fortnite.png]] |
||
| + | |Currency |
||
| + | |Currency used to purchase services or items from [[Characters]]. |
||
| + | |- |
||
| + | |[[Nuts 'n' Bolts (Battle Royale)|Nuts 'n' Bolts]] |
||
| + | |[[File:Nuts n' Bolts - Material - Fortnite.png|alt=|center|100px|link=https://fortnite.fandom.com/wiki/File:Nuts_n'_Bolts_-_Material_-_Fortnite.png]] |
||
| + | |[[Crafting (Battle Royale)|Crafting Resource]] |
||
| + | |Used to change weapons into their alternative versions |
||
| + | |- |
||
| + | |[[Cube Monster Parts]] |
||
| + | |[[File:Cube Monster Parts - Crafting Resource - Fortnite.png|alt=|center|100x100px|link=https://fortnite.fandom.com/wiki/File:Cube_Monster_Parts_-_Crafting_Resource_-_Fortnite.png]] |
||
| + | |[[Crafting (Battle Royale)|Crafting Resource]] |
||
| + | |Used to upgrade Sideways weaponry. |
||
| + | |- |
||
| + | |[[Medium Bullets]] |
||
| + | |[[File:Medium Bullets - Ammo - Fortnite.png|center|100px|link=https://fortnite.fandom.com/wiki/File:Medium_Bullets_-_Ammo_-_Fortnite.png]] |
||
| + | |[[Ammunition|Ammo]] |
||
| + | |Ammo used for mainly for [[Assault Weapons (Battle Royale)|Assault Weapons]], and some [[Pistols (Battle Royale)|Pistols]]. |
||
| + | |- |
||
| + | |[[Shell|Shells]] |
||
| + | |[[File:Shells - Ammo - Fortnite.png|alt=|center|100px|link=https://fortnite.fandom.com/wiki/File:Shells_-_Ammo_-_Fortnite.png]] |
||
| + | |[[Ammunition|Ammo]] |
||
| + | |Ammo used for mainly for [[Shotguns (Battle Royale)|Shotguns]], and some [[Bows]]. |
||
| + | |- |
||
| + | |[[Light Bullets]] |
||
| + | |[[File:Light Bullets - Ammo - Fortnite.png|alt=|center|100px|link=https://fortnite.fandom.com/wiki/File:Light_Bullets_-_Ammo_-_Fortnite.png]] |
||
| + | |[[Ammunition|Ammo]] |
||
| + | |Ammo mainly used for [[Submachine Guns (Battle Royale)|Submachine Guns]], and [[Pistols (Battle Royale)|Pistols]]. |
||
| + | |- |
||
| + | |[[Rockets]] |
||
| + | |[[File:Rockets - Ammo - Fortnite.png|alt=|center|100px|link=https://fortnite.fandom.com/wiki/File:Rockets_-_Ammo_-_Fortnite.png]] |
||
| + | |[[Ammunition|Ammo]] |
||
| + | |Ammo used for [[Explosive Weapons]]. |
||
| + | |- |
||
| + | |[[Assault Rifle]] |
||
| + | |[[File:Assault Rifle - Weapon - Fortnite.png|center|100px|link=https://fortnite.fandom.com/wiki/File:Assault Rifle - Weapon - Fortnite.png]][[File:Assault Rifle (High Level) - Weapon - Fortnite.png|center|100px|link=https://fortnite.fandom.com/wiki/File:Assault Rifle (High Level) - Weapon - Fortnite.png]] |
||
|[[Assault Weapons (Battle Royale)|Assault Weapon]] |
|[[Assault Weapons (Battle Royale)|Assault Weapon]] |
||
| + | |Fully Automatic Assault Weapon. |
||
|- |
|- |
||
| − | |[[ |
+ | |[[Burst Assault Rifle]] |
| + | |[[File:Burst Assault Rifle - Weapon - Fortnite.png|center|100px|link=https://fortnite.fandom.com/wiki/File:Burst Assault Rifle - Weapon - Fortnite.png]][[File:Burst Assault Rifle (High Tier) - Weapon - Fortnite.png|center|100px|link=https://fortnite.fandom.com/wiki/File:Burst Assault Rifle (High Tier) - Weapon - Fortnite.png]] |
||
| − | |[[File:Sideways Minigun - Weapon - Fortnite.png|100px|center]] |
||
| − | |{{Common}} |
||
|[[Assault Weapons (Battle Royale)|Assault Weapon]] |
|[[Assault Weapons (Battle Royale)|Assault Weapon]] |
||
| + | |2 round, Full auto burst Assault Rifle. |
||
|- |
|- |
||
| + | |[[Sideways Rifle]] + {{Common}} Variant |
||
| − | |[[Combat SMG]] |
||
| − | |[[File: |
+ | |[[File:Sideways Rifle - Weapon - Fortnite.png|alt=|center|100x100px|link=https://fortnite.fandom.com/wiki/File:Sideways_Rifle_-_Weapon_-_Fortnite.png]] |
| + | |[[Assault Weapons (Battle Royale)|Assault Weapon]] |
||
| − | |{{Common}} |
||
| + | |Rifle which gains damage the closer it gets to overheating. |
||
| − | {{Uncommon}}<br> |
||
| + | |- |
||
| − | {{Rare}}<br> |
||
| + | |[[Sideways Minigun]] + {{Common}} Variant |
||
| − | {{Epic}}<br> |
||
| + | |[[File:Sideways Minigun - Weapon - Fortnite.png|alt=|center|100x100px|link=https://fortnite.fandom.com/wiki/File:Sideways_Minigun_-_Weapon_-_Fortnite.png]] |
||
| − | {{Legendary}} |
||
| + | |[[Assault Weapons (Battle Royale)|Assault Weapon]] |
||
| − | |[[Submachine Guns (Class)|Submachine Gun]] |
||
| + | |Minigun which fires faster the closer it gets to overheating. |
||
| + | |- |
||
| + | |[[Dual Fiend Hunters]] |
||
| + | |[[File:Dual Fiend Hunters - Weapon - Fortnite.png|center|100px|link=https://fortnite.fandom.com/wiki/File:Dual_Fiend_Hunters_-_Weapon_-_Fortnite.png]] |
||
| + | |[[Bows]] |
||
| + | |Shoots an arrow that deals heavy damage to Fiends |
||
| + | |- |
||
| + | |[[Boom Bow (Battle Royale)|Boom Bow]] |
||
| + | |[[File:Boom Bow - Weapon - Fortnite.png|alt=|center|100px|link=https://fortnite.fandom.com/wiki/File:Boom Bow - Weapon - Fortnite.png]] |
||
| + | |[[Bows]] |
||
| + | |Explosive Bow. Explodes on impact. |
||
| + | |- |
||
| + | |[[Rocket Launcher|Pumpkin Launcher]] |
||
| + | |[[File:Pumpkin Launcher - Weapon - Fortnite.png|alt=|center|100px|link=https://fortnite.fandom.com/wiki/File:Pumpkin Launcher - Weapon - Fortnite.png]] |
||
| + | |[[Explosive Weapons|Explosive Weapon]] |
||
| + | |Seasonal version of the Rocket Launcher. |
||
| + | |- |
||
| + | |[[Grenade Launcher]] |
||
| + | |[[File:Grenade Launcher - Weapon - Fortnite.png|alt=|center|100px|link=https://fortnite.fandom.com/wiki/File:Grenade Launcher - Weapon - Fortnite.png]] |
||
| + | |[[Explosive Weapons|Explosive Weapon]] |
||
| + | |Shoots grenades which explode on a timer. |
||
| + | |- |
||
| + | |[[Pistol (Battle Royale)|Pistol]] |
||
| + | |[[File:Pistol - Weapon - Fortnite.png|alt=|center|100px|link=https://fortnite.fandom.com/wiki/File:Pistol_(Chapter_2)_-_Weapon_-_Fortnite.png]][[File:Pistol (High Tier) - Weapon - Fortnite.png|alt=|center|100px|link=https://fortnite.fandom.com/wiki/File:Pistol (High Tier) - Weapon - Fortnite.png]] |
||
| + | |[[Pistols (Battle Royale)|Pistol]] |
||
| + | |Semi Automatic, high fire rate pistol. |
||
| + | |- |
||
| + | |[[Suppressed Pistol]] |
||
| + | |[[File:Suppressed Pistol - Weapon - Fortnite.png|alt=|center|100px|link=https://fortnite.fandom.com/wiki/File:Suppressed Pistol - Weapon - Fortnite.png]] |
||
| + | |[[Pistols (Battle Royale)|Pistol]] |
||
| + | |Suppressed Version of the pistol. |
||
| + | |- |
||
| + | |[[Pump Shotgun]] |
||
| + | |[[File:Pump Shotgun - Weapon - Fortnite.png|alt=|center|100px|link=https://fortnite.fandom.com/wiki/File:Pump_Shotgun_-_Weapon_-_Fortnite.png]][[File:Pump Shotgun (High Tier) (Old) - Weapon - Fortnite.png|alt=|center|100px|link=https://fortnite.fandom.com/wiki/File:Pump_Shotgun.png]] |
||
| + | |[[Shotguns (Battle Royale)|Shotgun]] |
||
| + | |High Damage, Pump Action Shotgun. |
||
| + | |- |
||
| + | |[[Drum Shotgun]] |
||
| + | |[[File:Drum Shotgun.png|alt=|center|100px|link=https://fortnite.fandom.com/wiki/File:Drum_Shotgun.png]] |
||
| + | |[[Shotguns (Battle Royale)|Shotgun]] |
||
| + | |Fast Firing, Full Auto Shotgun. |
||
| + | |- |
||
| + | |[[Lever Action Shotgun]] |
||
| + | |[[File:Lever Action Shotgun - Weapon - Fortnite.png|alt=|center|100px|link=https://fortnite.fandom.com/wiki/File:Lever_Action_Shotgun_-_Weapon_-_Fortnite.png]] |
||
| + | |[[Shotguns (Battle Royale)|Shotgun]] |
||
| + | |High Damage, Lever Action Shotgun. |
||
| + | |- |
||
| + | |[[Automatic Sniper Rifle]] |
||
| + | |[[File:Automatic Sniper Rifle - Weapon - Fortnite.png|alt=|center|100px|link=https://fortnite.fandom.com/wiki/File:Automatic_Sniper_Rifle_-_Weapon_-_Fortnite.png]] |
||
| + | |[[Sniper Rifles (Battle Royale)|Sniper Rifle]] |
||
| + | |Fully Automatic Scoped Sniper Rifle. |
||
| + | |- |
||
| + | |[[Submachine Gun]] |
||
| + | |[[File:Submachine Gun - Weapon - Fortnite.png|alt=|center|100px|link=https://fortnite.fandom.com/wiki/File:SMG_-_Item.png]][[File:Submachine Gun (High Level) - Weapon - Fortnite.png|alt=|center|100px|link=https://fortnite.fandom.com/wiki/File:Submachine_Gun_(High_Level)_-_Weapon_-_Fortnite.png]] |
||
| + | |[[Submachine Guns (Battle Royale)|Submachine Gun]] |
||
| + | |Short Ranged, High Fire Rate SMG. |
||
| + | |- |
||
| + | |[[Compact SMG]] |
||
| + | |[[File:Compact SMG - Weapon - Fortnite.png|alt=|center|100px|link=https://fortnite.fandom.com/wiki/File:Icon_Compact_SMG_-_Battle_Royale.png]] |
||
| + | |[[Submachine Guns (Battle Royale)|Submachine Gun]] |
||
| + | |Identical to the High Tier Submachine Guns. |
||
| + | |- |
||
| + | |[[Harpoon Gun]] |
||
| + | |[[File:Harpoon Gun - Weapon - Fortnite.png|alt=|center|100px|link=https://fortnite.fandom.com/wiki/File:Harpoon_Gun_-_Weapon_-_Fortnite.png]] |
||
| + | |[[Miscellaneous Items (Battle Royale)|Misc]] |
||
| + | |Weapon which can be used to fish, or pull enemies closer to you. |
||
| + | |- |
||
| + | |[[Recon Scanner]] |
||
| + | |[[File:Recon Scanner - Weapon - Fortnite.png|center|100px|link=https://fortnite.fandom.com/wiki/File:Recon_Scanner_-_Weapon_-_Fortnite.png]] |
||
| + | |[[Miscellaneous Items (Battle Royale)|Misc]] |
||
| + | |Scans Opponents and [[Containers]] in a radius. |
||
| + | |- |
||
| + | |[[Mini Shield Potion]] |
||
| + | |[[File:Small Shield Potion (Chapter 2) - Consumable - Fortnite.png|alt=|center|99x99px|link=https://fortnite.fandom.com/wiki/File:Small_Shield_Potion_(Chapter_2)_-_Consumable_-_Fortnite.png]] |
||
| + | |[[Healing Items|Healing]] |
||
| + | |Heals 25 Shield, up to 50. |
||
| + | |- |
||
| + | |[[Shield Potion]] |
||
| + | |[[File:Shield Potion (Chapter 2) - Consumable - Fortnite.png|alt=|center|99x99px|link=https://fortnite.fandom.com/wiki/File:Shield_Potion_(Chapter_2)_-_Consumable_-_Fortnite.png]] |
||
| + | |[[Healing Items|Healing]] |
||
| + | |Heals 50 Shield. |
||
| + | |- |
||
| + | |[[Bandages]] |
||
| + | |[[File:Bandages - Healing Item - Fortnite.png|alt=|center|99x99px|link=https://fortnite.fandom.com/wiki/File:Bandages_-_Healing_Item_-_Fortnite.png]] |
||
| + | |[[Healing Items|Healing]] |
||
| + | |Heals 15 HP, up to 75. |
||
| + | |- |
||
| + | |[[Medkit]] |
||
| + | |[[File:Consumable medkit.png|center|99x99px|link=https://fortnite.fandom.com/wiki/File:Consumable_medkit.png]] |
||
| + | |[[Healing Items|Healing]] |
||
| + | |Heals 100HP. |
||
| + | |- |
||
| + | |[[Rift-To-Go]] |
||
| + | |[[File:Rift-To-Go - Item - Fortnite.png|alt=|center|99x99px|link=https://fortnite.fandom.com/wiki/File:Rift-To-Go_-_Item_-_Fortnite.png]] |
||
| + | |Misc |
||
| + | |Spawns a rift. |
||
| + | |- |
||
| + | |[[Grenade]] |
||
| + | |[[File:Grenade - Item - Fortnite.png|alt=|center|99x99px|link=https://fortnite.fandom.com/wiki/File:Grenade_(Current).png]] |
||
| + | |[[Throwable Items|Throwables]] |
||
| + | |Explosive on a short timer. |
||
| + | |- |
||
| + | |[[Clingers]] |
||
| + | |[[File:Clinger - Item - Fortnite.png|alt=|center|99x99px|link=https://fortnite.fandom.com/wiki/File:Clinger - Item - Fortnite.png]] |
||
| + | |[[Throwable Items|Throwables]] |
||
| + | |Explosive which sticks to surfaces and players. |
||
| + | |- |
||
| + | |[[Dynamite (item)|Dynamite]] |
||
| + | |[[File:Dynamite - Item - Fortnite.png|alt=|center|99x99px|link=https://fortnite.fandom.com/wiki/File:Dynamite - Item - Fortnite.png]] |
||
| + | |[[Throwable Items|Throwables]] |
||
| + | |Explosive which deals high structure damage. |
||
| + | |- |
||
| + | |[[Boom Box]] |
||
| + | |[[File:Boom Box - Item - Fortnite.png|alt=|center|99x99px|link=https://fortnite.fandom.com/wiki/File:Boom Box - Item - Fortnite.png]] |
||
| + | |[[Throwable Items|Throwables]] |
||
| + | |Destroys builds by rapidly damaging them in a radius. |
||
| + | |- |
||
| + | |[[Firefly Jar]] |
||
| + | |[[File:Firefly Jar - Item - Fortnite.png|alt=|center|99x99px|link=https://fortnite.fandom.com/wiki/File:Firefly_Jar_-_Throwable_-_Fortnite.png]] |
||
| + | |[[Throwable Items|Throwables]] |
||
| + | |Ignites any structures it hits. |
||
| + | |- |
||
| + | |[[Shockwave Grenade]] |
||
| + | |[[File:Shockwave Grenade - Item - Fortnite.png|alt=|center|99x99px|link=https://fortnite.fandom.com/wiki/File:Shockwave_grenade_icon.png]] |
||
| + | |[[Throwable Items|Throwables]] |
||
| + | |Launches a player and negates their fall damage. |
||
| + | |- |
||
| + | |[[Chug Splash]] |
||
| + | |[[File:Chug Splash - Item - Fortnite.png|alt=|center|99x99px|link=https://fortnite.fandom.com/wiki/File:Chug_Splash_-_Throwable_-_Fortnite.png]] |
||
| + | |[[Throwable Items|Throwable]] |
||
| + | |Heals 20 Effective Health. |
||
| + | |- |
||
| + | |[[Chilli Chug Splashes|Chili Chug Splash]] |
||
| + | |[[File:Chili Chug Splash - Item - Fortnite.png|link=https://fortnite.fandom.com/wiki/File:Chili%20Chug%20Splash%20-%20Item%20-%20Fortnite.png|alt=|center|99x99px]] |
||
| + | |[[Throwable Items|Throwable]] |
||
| + | |Heals 20 Effective Health. Grants a speed boost. |
||
| + | |- |
||
| + | |[[Gas Can]] |
||
| + | |[[File:Gas Can - Item - Fortnite.png|alt=|center|99x99px|link=https://fortnite.fandom.com/wiki/File:Gas_Can_-_Item_-_Fortnite.png]] |
||
| + | |[[Throwable Items|Throwables]] |
||
| + | |Allows the player to refuel a [[Vehicles (Battle Royale)|vehicle]]. |
||
| + | |- |
||
| + | |[[Damage Trap]] |
||
| + | |[[File:Damage Trap - Trap - Fortnite.png|alt=|center|99x99px|link=https://fortnite.fandom.com/wiki/File:Damage_Trap_-_Trap_-_Fortnite.png]] |
||
| + | |[[Traps (Battle Royale)|Trap]] |
||
| + | |Deals a large amount of damage. |
||
| + | |- |
||
| + | |[[Cozy Campfire]] |
||
| + | |[[File:Cozy Campfire - Trap - Fortnite.png|alt=|center|99x99px|link=https://fortnite.fandom.com/wiki/File:Cozy_Campfire_-_Fortnite_Battle_Royale.png]] |
||
| + | |[[Traps (Battle Royale)|Trap]] |
||
| + | |Heals HP over time. |
||
| + | |- |
||
| + | |[[Mounted Turret]] |
||
| + | |[[File:Mounted Turret - Trap - Fortnite.png|alt=|center|99x99px|link=https://fortnite.fandom.com/wiki/File:Mounted_Turret_-_Trap_-_Fortnite.png]] |
||
| + | |[[Traps (Battle Royale)|Trap]] |
||
| + | |Spawns a turret which can be operated to deal damage. |
||
| + | |- |
||
| + | |[[Armored Wall]] |
||
| + | |[[File:Armored Wall - Trap - Fortnite.png|alt=|center|99x99px|link=https://fortnite.fandom.com/wiki/File:Armored_Wall_-_Trap_-_Fortnite.png]] |
||
| + | |[[Traps (Battle Royale)|Trap]] |
||
| + | |Reinforces a wall, giving it extra HP. |
||
|} |
|} |
||
| + | |||
| + | * Weapons such as the [[Suppressed Assault Rifle]] and [[Charge Shotgun]] can still be crafted in this mode. |
||
| + | * All [[Foraged Items]] and [[fish]] present in standard playlists also appear in this mode. |
||
| + | |||
| + | == History == |
||
| + | |||
| + | === [[Season 9]] === |
||
| + | |||
| + | * [[Update v9.21]]: Added Horde Rush. |
||
| + | |||
| + | === [[Chapter 2: Season 8]] === |
||
| + | |||
| + | * [[Update v18.20]]: Horde Rush returns. |
||
| + | ** New Loot Pool. |
||
| + | ** New Enemies. |
||
| + | ** New Final Boss. |
||
| + | |||
== Trivia == |
== Trivia == |
||
| + | |||
| − | * This LTM is similar to the [[Elminate and Collect]] Mission in Save the World. |
||
| − | * |
+ | * Chest spawns appear to be at 100% in this mode. |
| + | * The reason why the Loot Pool is full of seemingly random items, is likely because it was not altered significantly since its introduction in Season 9, hence the Drum Shotgun and Boom Bow. |
||
| − | * Ranged Ice Sideways Fiends are only available in this LTM. |
||
| + | |||
[[Category:Limited Time Modes]] |
[[Category:Limited Time Modes]] |
||
Revision as of 19:46, 22 October 2021
| “ | Squad up and prepare to defend against the horde of Fiends invading the island.
|
” |
- — In-Game Description
Horde Rush is a Limited Time Mode in Fortnite: Battle Royale that released in Season 9. The mode was brought back in Chapter 2: Season 8 with alterations.
LTM Rules and Gameplay
Horde Rush is a Cooperative gamemode, similar to modes present in Fortnite: Save the World. Players must work together to eliminate Cube Monsters, and complete three Encounters. Players win the mode by eliminating the Boss, The Caretaker.
Players fight in three encounters:
- Players have 150 seconds to loot the area, and prepare for an attack. Monsters will spawn from Obelisks, and players complete the round by surviving.
- Players must then follow the storm to a new location, fighting monsters all the way.
- Players then have another 60 seconds to loot the area. Monsters again spawn from Obelisks, and players must eliminate a Cube Assassin. Players complete the round by surviving.
- Players must then follow the storm again to a new location, fighting monsters all the way.
- Players then have another 60 seconds to loot the area. Monsters again spawn from Obelisks, and players must eliminate a Caretaker. Players complete the round by eliminating the Boss, and winning the game.
As rounds increase, more enemies spawn, and different varieties too. The storm circle continuously shrinks as players stay alive.
Enemies
Enemies that spawn in round 2 will also spawn as the storm begins to move after the end of the first round. All of the enemies, bar the Cube Assassin and Caretaker will drop Cube Monster parts. All enemies bar the Caretaker will drop various loot on elimination.
| Enemy Name | Icon | Round Spawns |
|---|---|---|
| Fiend |  |
All |
| Elite Fiend |  |
All |
| Ranged Fiend | _-_Creatures_-_Fortnite.png) |
All |
| Poison Fiend | _-_Creatures_-_Fortnite.png) |
All |
| Ice Fiend | _-_Creatures_-_Fortnite.png) |
2 and 3 |
| Brute |  |
All |
| Elite Brute | _-_Creatures_-_Fortnite.png) |
All |
| Exploding Brute | _-_Creatures_-_Fortnite.png) |
2 and 3 |
| Mega Brute | 2 and 3 | |
| Caretaker | 3 only | |
| Cube Assassin | 2 only |
Loot
Loot tables are different in this mode, and the items available are, but not limited to:
| Name | Icon | Category | Description |
|---|---|---|---|
| Wood |  |
Material | Basic Material obtained from wooden structures, such as trees. |
| Stone |  |
Material | Basic Material obtained from stone structures, such as rocks. |
| Metal |  |
Material | Basic Material obtained from metal structures, such as vehicles. |
| Bars | _-_Currency_-_Fortnite.png) |
Currency | Currency used to purchase services or items from Characters. |
| Nuts 'n' Bolts |  |
Crafting Resource | Used to change weapons into their alternative versions |
| Cube Monster Parts |  |
Crafting Resource | Used to upgrade Sideways weaponry. |
| Medium Bullets |  |
Ammo | Ammo used for mainly for Assault Weapons, and some Pistols. |
| Shells |  |
Ammo | Ammo used for mainly for Shotguns, and some Bows. |
| Light Bullets |  |
Ammo | Ammo mainly used for Submachine Guns, and Pistols. |
| Rockets |  |
Ammo | Ammo used for Explosive Weapons. |
| Assault Rifle | 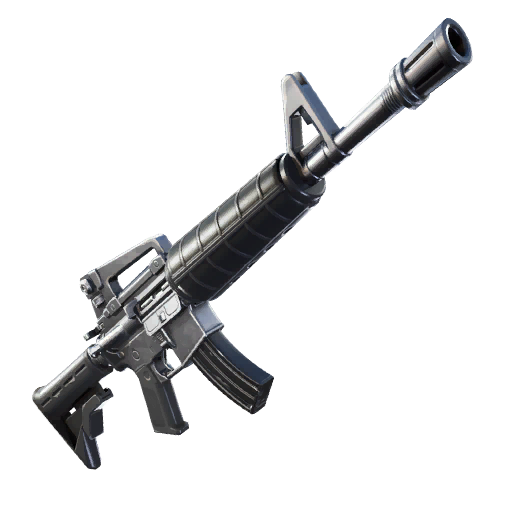 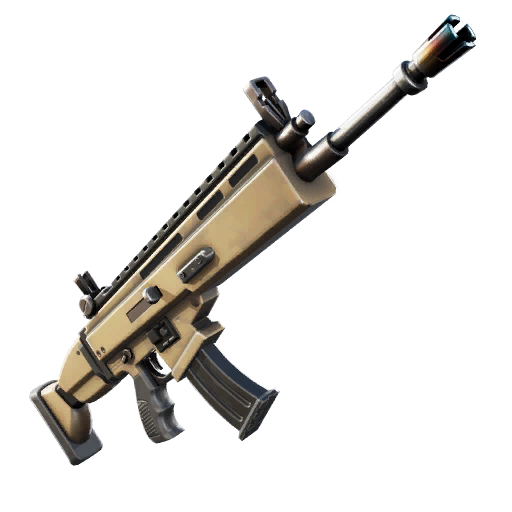 |
Assault Weapon | Fully Automatic Assault Weapon. |
| Burst Assault Rifle | 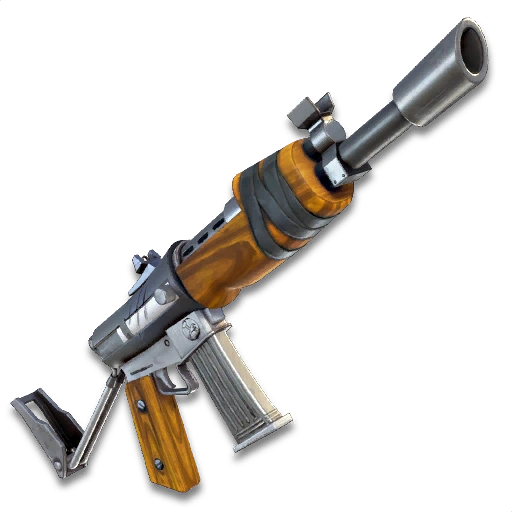 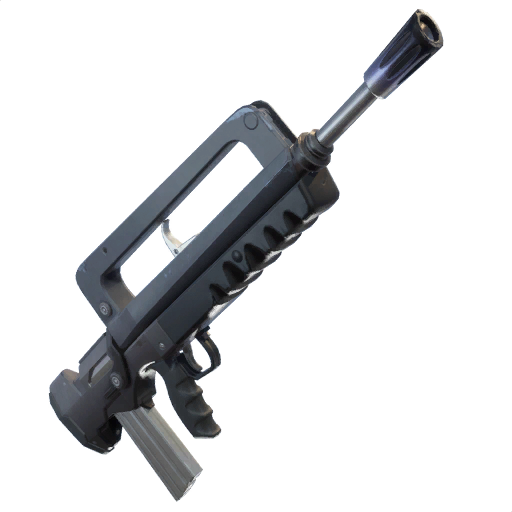 |
Assault Weapon | 2 round, Full auto burst Assault Rifle. |
| Sideways Rifle + Common Variant |  |
Assault Weapon | Rifle which gains damage the closer it gets to overheating. |
| Sideways Minigun + Common Variant |  |
Assault Weapon | Minigun which fires faster the closer it gets to overheating. |
| Dual Fiend Hunters |  |
Bows | Shoots an arrow that deals heavy damage to Fiends |
| Boom Bow | 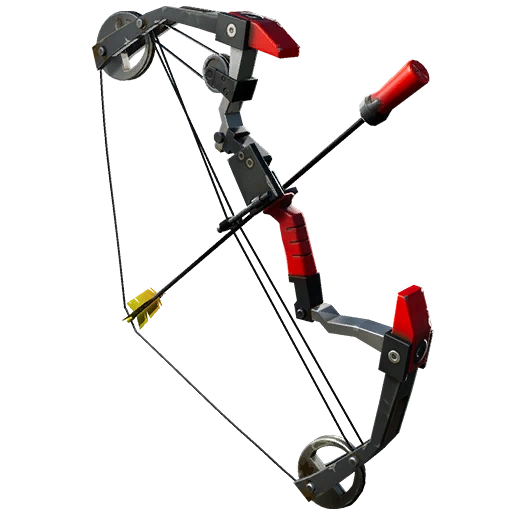 |
Bows | Explosive Bow. Explodes on impact. |
| Pumpkin Launcher | 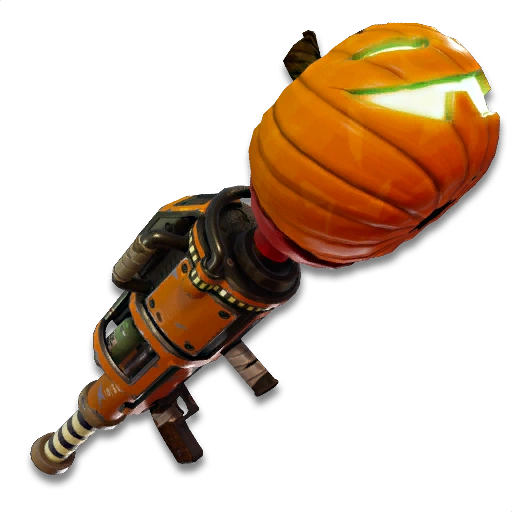 |
Explosive Weapon | Seasonal version of the Rocket Launcher. |
| Grenade Launcher | 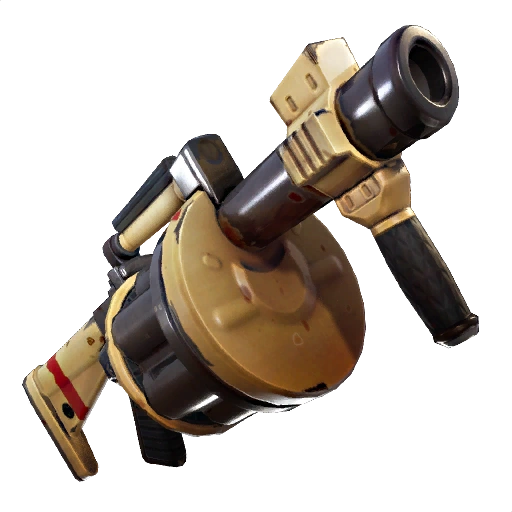 |
Explosive Weapon | Shoots grenades which explode on a timer. |
| Pistol | _-_Weapon_-_Fortnite.png) 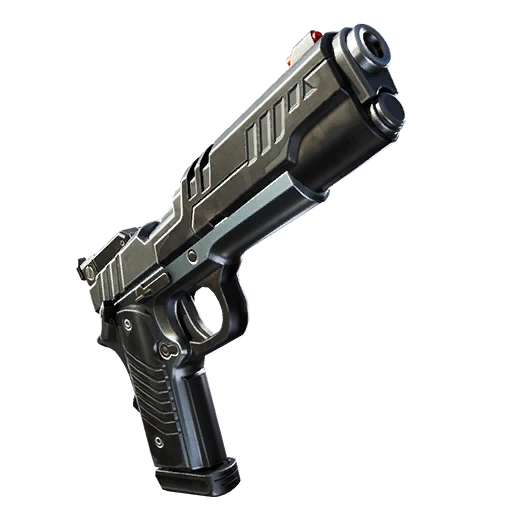 |
Pistol | Semi Automatic, high fire rate pistol. |
| Suppressed Pistol |  |
Pistol | Suppressed Version of the pistol. |
| Pump Shotgun |   |
Shotgun | High Damage, Pump Action Shotgun. |
| Drum Shotgun |  |
Shotgun | Fast Firing, Full Auto Shotgun. |
| Lever Action Shotgun |  |
Shotgun | High Damage, Lever Action Shotgun. |
| Automatic Sniper Rifle |  |
Sniper Rifle | Fully Automatic Scoped Sniper Rifle. |
| Submachine Gun |  _-_Weapon_-_Fortnite.png) |
Submachine Gun | Short Ranged, High Fire Rate SMG. |
| Compact SMG |  |
Submachine Gun | Identical to the High Tier Submachine Guns. |
| Harpoon Gun |  |
Misc | Weapon which can be used to fish, or pull enemies closer to you. |
| Recon Scanner |  |
Misc | Scans Opponents and Containers in a radius. |
| Mini Shield Potion | _-_Consumable_-_Fortnite.png) |
Healing | Heals 25 Shield, up to 50. |
| Shield Potion | _-_Consumable_-_Fortnite.png) |
Healing | Heals 50 Shield. |
| Bandages |  |
Healing | Heals 15 HP, up to 75. |
| Medkit |  |
Healing | Heals 100HP. |
| Rift-To-Go |  |
Misc | Spawns a rift. |
| Grenade | .png) |
Throwables | Explosive on a short timer. |
| Clingers |  |
Throwables | Explosive which sticks to surfaces and players. |
| Dynamite | 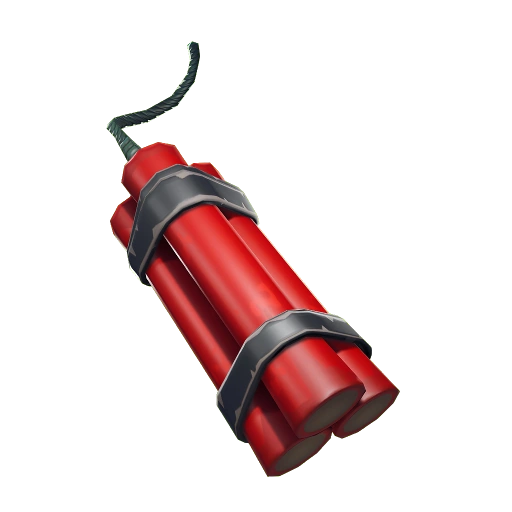 |
Throwables | Explosive which deals high structure damage. |
| Boom Box | 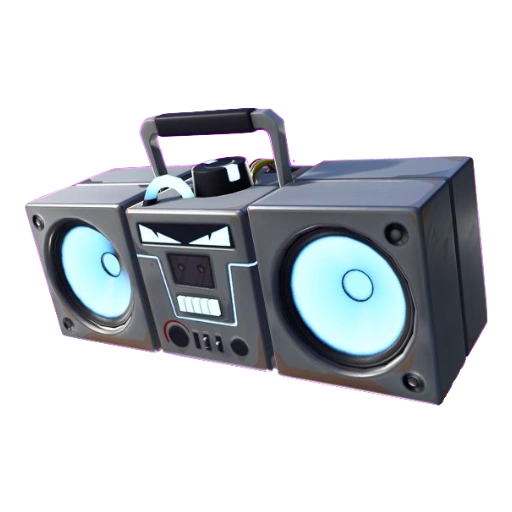 |
Throwables | Destroys builds by rapidly damaging them in a radius. |
| Firefly Jar |  |
Throwables | Ignites any structures it hits. |
| Shockwave Grenade | Throwables | Launches a player and negates their fall damage. | |
| Chug Splash |  |
Throwable | Heals 20 Effective Health. |
| Chili Chug Splash |  |
Throwable | Heals 20 Effective Health. Grants a speed boost. |
| Gas Can |  |
Throwables | Allows the player to refuel a vehicle. |
| Damage Trap |  |
Trap | Deals a large amount of damage. |
| Cozy Campfire |  |
Trap | Heals HP over time. |
| Mounted Turret |  |
Trap | Spawns a turret which can be operated to deal damage. |
| Armored Wall |  |
Trap | Reinforces a wall, giving it extra HP. |
- Weapons such as the Suppressed Assault Rifle and Charge Shotgun can still be crafted in this mode.
- All Foraged Items and fish present in standard playlists also appear in this mode.
History
Season 9
- Update v9.21: Added Horde Rush.
Chapter 2: Season 8
- Update v18.20: Horde Rush returns.
- New Loot Pool.
- New Enemies.
- New Final Boss.
Trivia
- Chest spawns appear to be at 100% in this mode.
- The reason why the Loot Pool is full of seemingly random items, is likely because it was not altered significantly since its introduction in Season 9, hence the Drum Shotgun and Boom Bow.